Importing Assets
Overview
Use the CSV importer to add large numbers of assets at once — for example, when entering an existing equipment register into the system for the first time.
To access: Admin → Import
Getting the Sample CSV
Download the official sample CSV from the import screen or directly from:
https://github.com/grokability/snipe-it/tree/master/sample_csvs
Required Fields
| Field | Required | Notes |
|---|---|---|
| Asset Tag | On update | Used to identify the asset. Can be omitted if auto-increment is on |
| Model Name | On create | Will be created if it doesn’t exist |
| Category | On create | Will be created if it doesn’t exist |
| Status | On create | e.g. Ready to Deploy |
Useful Optional Fields
| Field | Example | Notes |
|---|---|---|
| Serial | SN123456 | Unique per physical device |
| Purchase Date | 2024-06-01 | Format: YYYY-MM-DD |
| Purchase Cost | 450000.00 | No currency symbols or commas |
| Location | Lekki Office | Will be created if it doesn’t exist |
| Supplier | Luminous Nigeria | |
| Manufacturer | Felicity Solar | Will be created if it doesn’t exist |
| Warranty Months | 24 | Number only |
| Notes | Batch June 2024 |
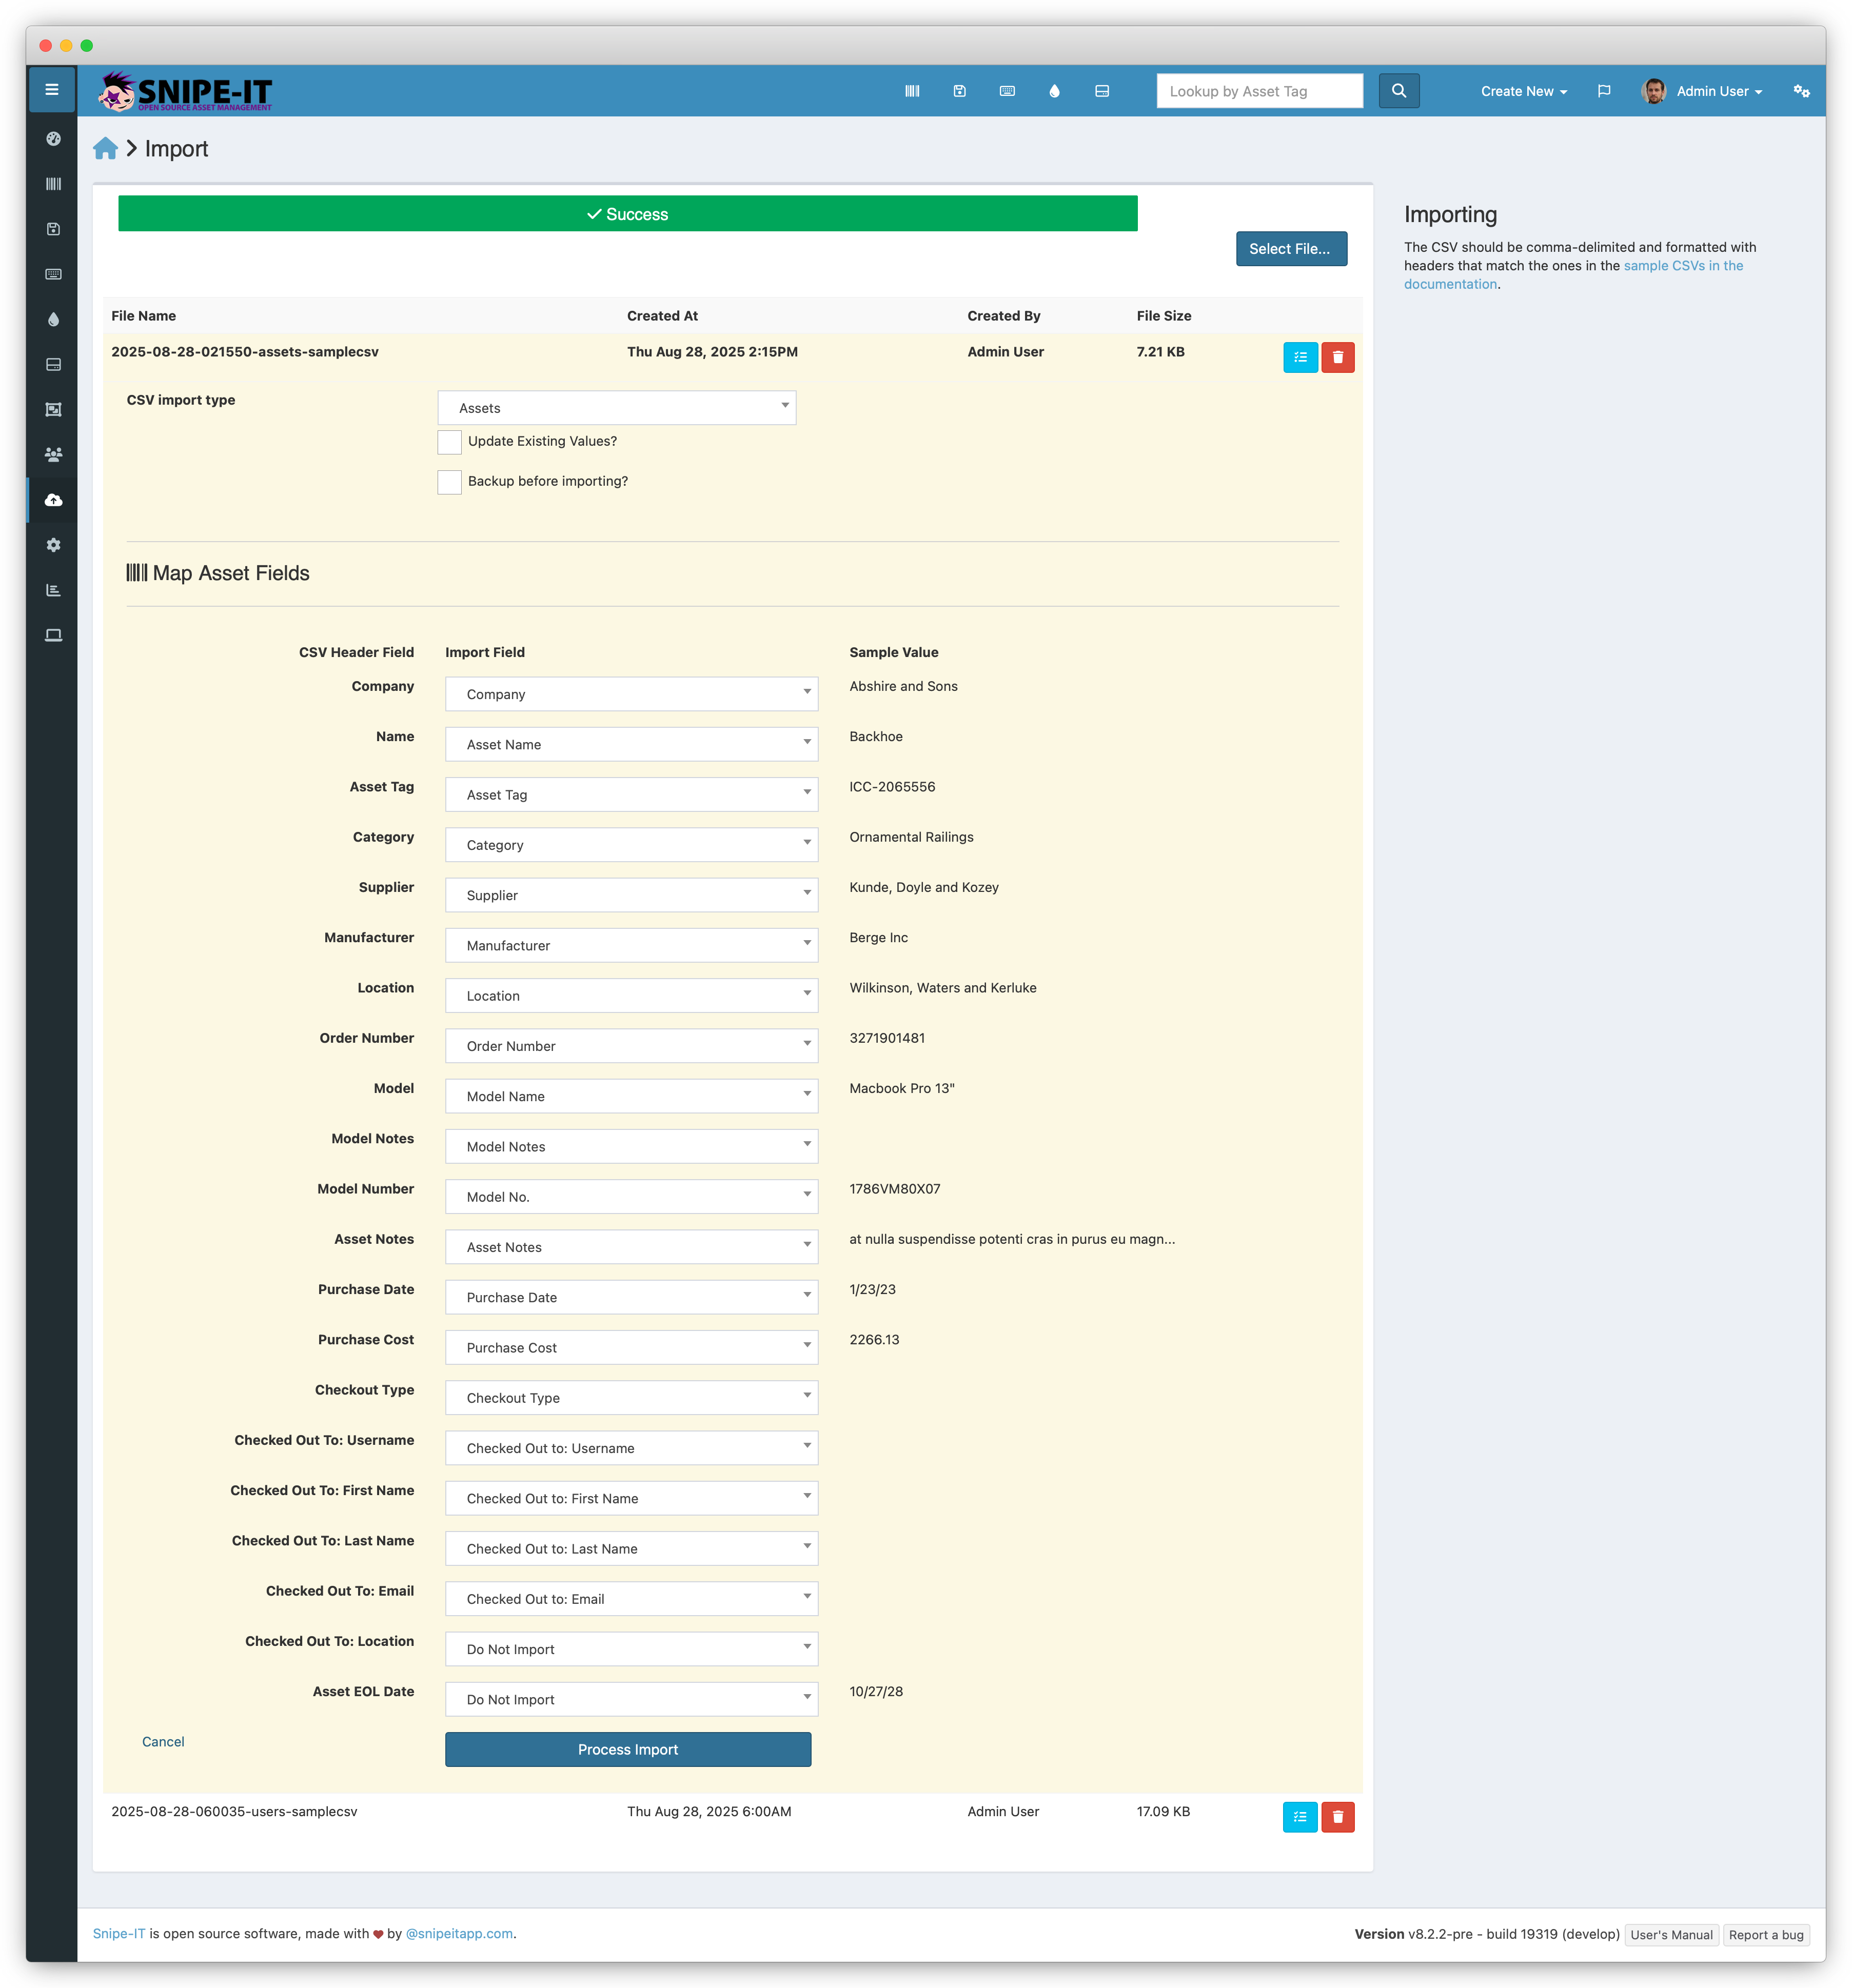
Running the Import
- Go to Admin → Import
- Click Import Assets
- Upload your CSV file
- Map each CSV column to the correct Snipe-IT field
- Click Import
- Review the results — errors are shown per row
If a status label in your CSV doesn’t exist yet, the system creates it but sets no attributes. Go to Admin → Status Labels after import and confirm each label has the correct type (Deployable, Undeployable, Archived, etc.).
Importing Custom Fields
If your assets have custom fields (e.g. installation site, warranty contact):
- Create the custom fields in Admin → Custom Fields first
- Create a custom fieldset and assign the fields to it
- Assign the fieldset to the relevant asset model
- Add columns to your CSV using the exact same field names
- Run the import — unmatched columns are skipped silently